In the construction field, we know that plaster has the most importance out of similar materials. The structure made by plaster has a better finish and can resist climatical changes as well. However; like other materials, if we use a low quality plaster, our surface can face different defects, and that will reduce the quality and effects of plasterwork.
A low quality plaster can cause the surface to crumble and crack. Further; this can also cause water damage and plumbing leaks. These two problems will cause peeling on the surface and will also cause leaching of minerals and salts on the surface.
These minor cracks can cause further damage to the surface of your structure, and you should repair these cracks at earliest. Now, let’s discuss the procedure through which you can repair these problems. If you have small cracks, they are relatively easy to repair. However; the repairing of tiny cracks is associated with the condition that paster should have a firm connection with the lath behind.
Repairing the Cracks in Plaster
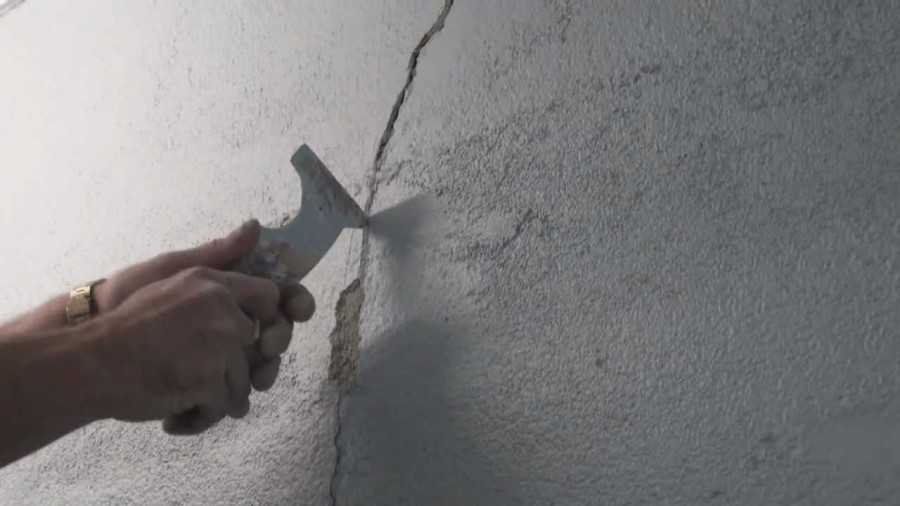
First of all, you need to wear safety glasses before starting the repair procedure. Now, take a can opener. You should use a level type can opener and then further open the crack about 0.2 inches. You can use a knife or screwdriver as well for this procedure.
Now take a medium bristle brush and scrub the area of the crack. When you attempt to scrub the area, you should use a solution of tri-sodium phosphate and water. The procedure of applying the solution will blow out the dust in the crack. Now cover the groove by using fibreglass mesh joint tape.
Now we need to damp the area. You can damp the area by using clean water through a sponge. Mix the setting-type joint and apply over the tape. You can apply the join over the tape and groove by using a 3-inch wide knife. You should spread the joint on the surface and leave it for drying.
After the applied joint is dry enough, we need to apply another layer of joint. Please ensure that you apply the second layer very smoothly in such a way that the edges of the joint should spill in the undamaged area of the surface. In the ending step, apply a high-quality latex primer and then paint the area.
Repairing the Holes in Plaster
If you have holes in the plaster of the surface, you can repair these holes quickly. Before starting the repairing procedure, we should make sure that the lath which grips the plaster is intact or not. If the lath is intact, we can begin the repairing procedure. For this repairing procedure, we will be mixing the joint compound with plaster of Paris.
First of all, we need to clear the dust particles in the hole and then we should push the plaster mixture into the hole through the edges. Now, we should apply a scratch coat. After applying the scratch coat, we should allow the coat to dry and afterwards should apply a finishing coat.
We need to install backing if there isn’t any backing behind the plaster hole. We need to enlarge the hole only till a level that it exposes the lath around the perimeter. Cut a piece of wire mesh and fill the opening. We can wound wire around dowels so it can hold the wires at a place.
Now, after applying the plaster mixture in different layers, we will remove the exposed wire. If you have limited plastering skills, smoothing the surface can be a difficult task. If this is the situation, you can use a joint compound which will give you a smooth surface.
If you don’t have an understanding of acquiring plasters, you can select the top quality plasters from https://www.evokepolishedplastering.co.uk/polished-plasters.